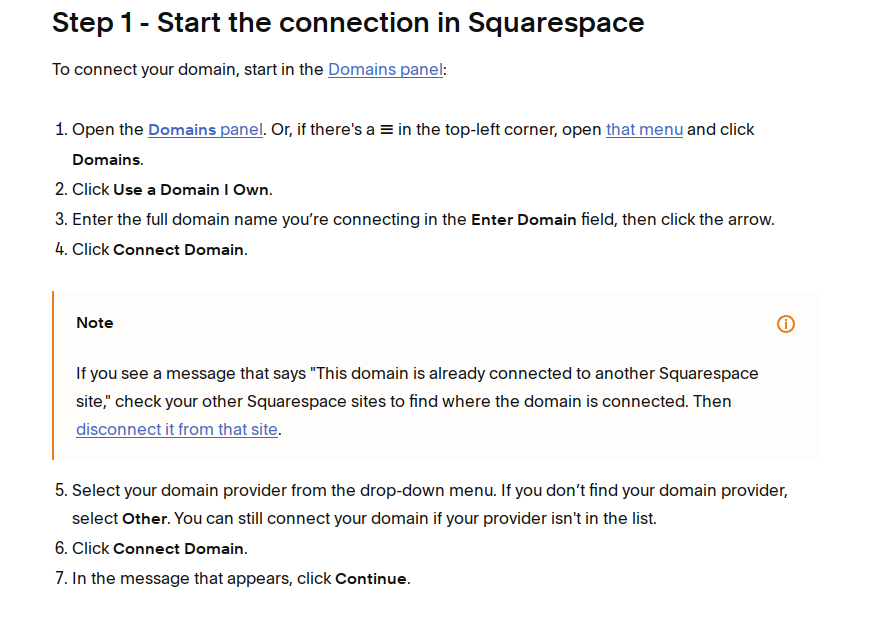
The whole process has to bigger parts:
In order to enter DNS records, you will first have to set do two things
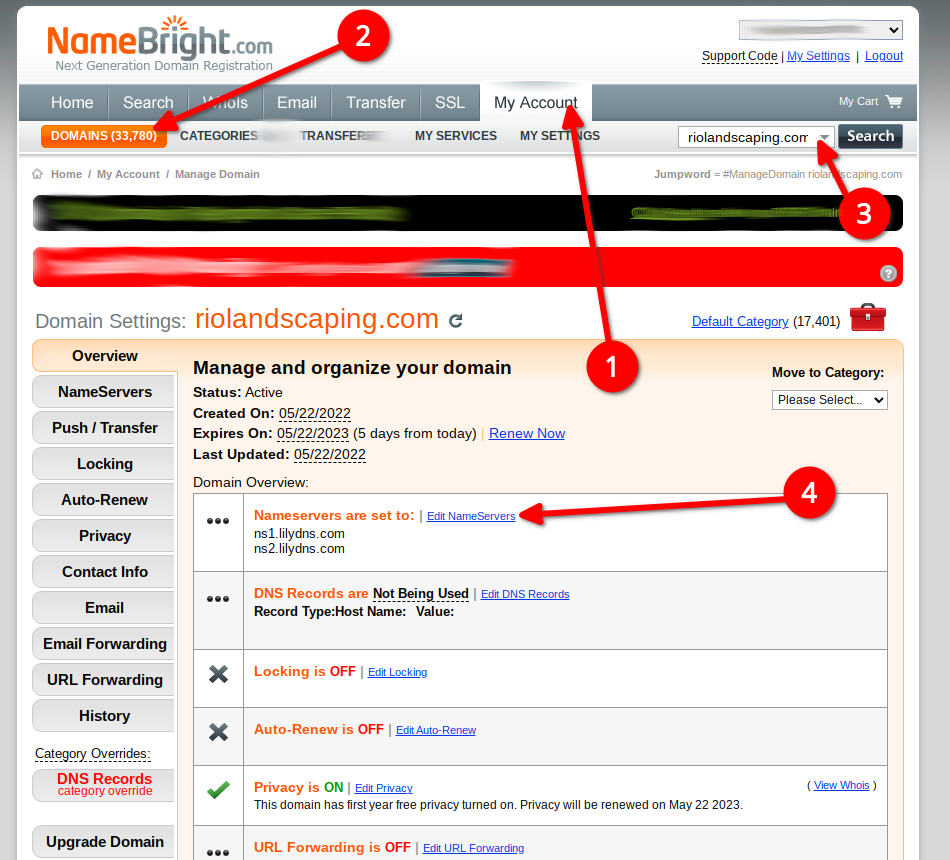
For start, please log into your NameBright account, and go to My Account -> Domains -> (select your domain) -> Find Namservers tab, and click onto "enter nameservers" link as shown on the image below:
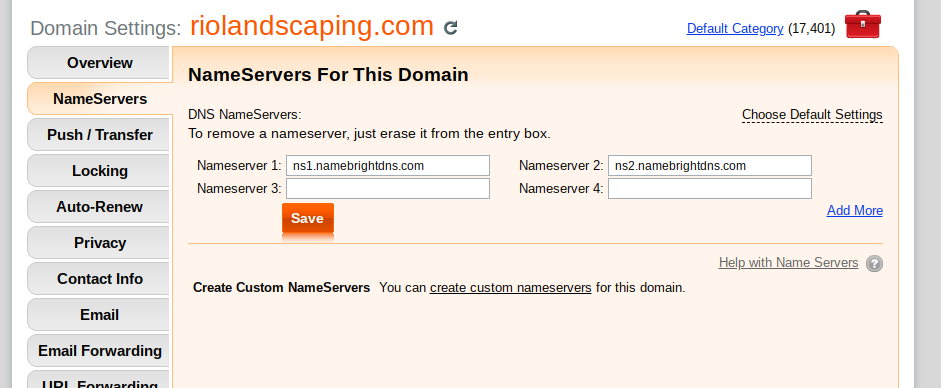
Then enter NameBright's nameservers
and click Save as shown on the image below:
To do that:
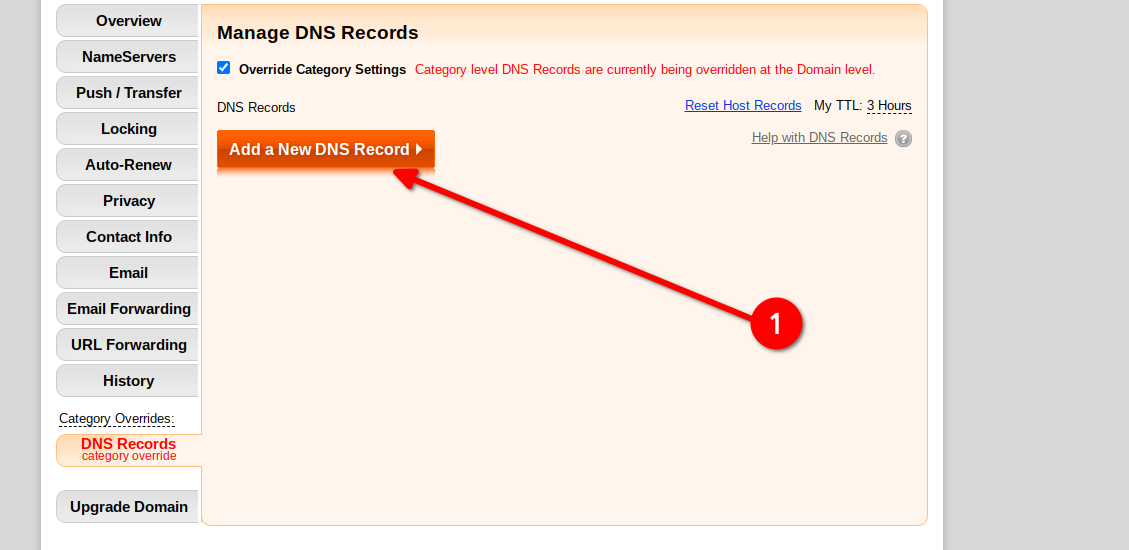
It should look something like the screenshot below:
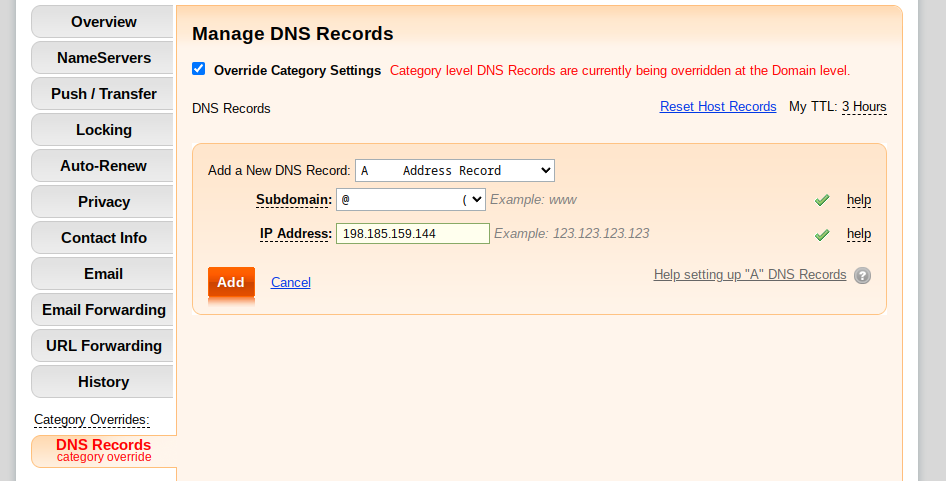
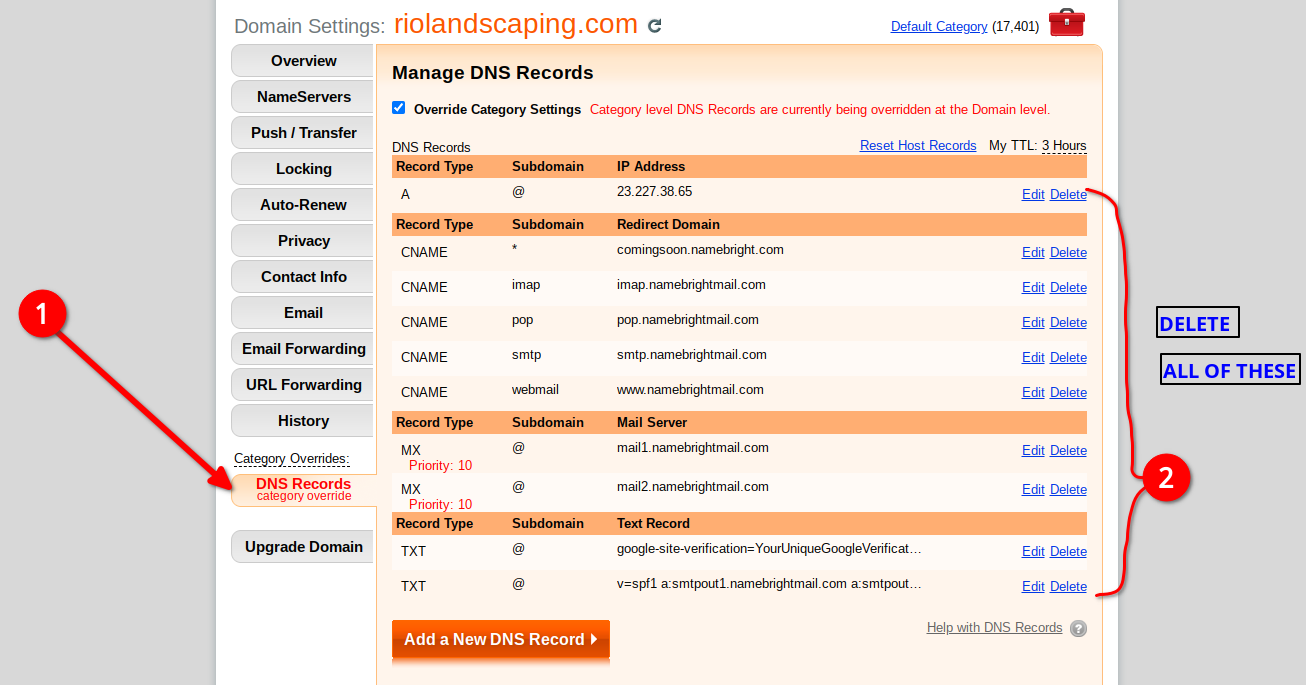
Now you need to repeat the same procedure for 3 more IP addresses. In all, you need to enter these 4
| Subdomain | Recordy Type | IP address |
|---|---|---|
| @ (no subdomain) | A | 198.185.159.144 (You have already entered this one if you have followed the step above) |
| @ (no subdomain) | A | 198.49.23.145 |
| @ (no subdomain) | A | 198.49.23.144 |
| @ (no subdomain) | A | 198.185.159.145 |
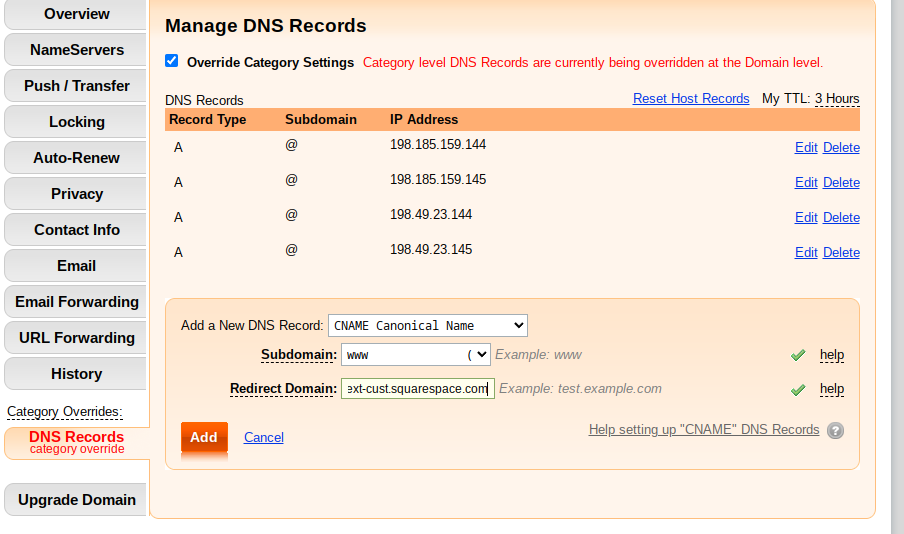
Now click onto Add a New DNS record button again and this time enter the following DNS record:
It should look something like the screenshot below:
This screeenshot basically sums-up all you need to do on their end: